Filming and Video Equipment For Recording Online Courses
Filming and Video Equipment For Recording Online Courses

course starter kit combo

Get Sarah's FREE Course Creation & Business Growth Training

Filming and Video Equipment For Recording Online Courses

For many, the thought of getting on camera is about as exciting as going to the dentist.

I remember when I first transitioned from teaching and presenting in person, to delivering on camera and it was a completely unexpected challenge.

I had been teaching in person for YEARS and had presented to crowds of thousands.  

I had become a very confident presenter and figured that doing the same thing on camera would be a total piece of cake.

Wrong!!

I was at a professional speaking training workshop and we were about to present our ‘TED’ talks……. to camera.

I was pretty cocky about it and thought ‘this will be easy’.  

I stood on the stage, as I had thousands of times, then suddenly noticed the massive camera-lens death-staring me in the eyeballs from between two giant globe lights.

All of a sudden, I froze.

I forgot how to think, talk and even stand up properly.

I still have a copy of that video and you can see my legs physically shaking.

You see, presenting to camera is NOT something that we fall out of the womb knowing how to do.

It requires practice.

Those who are good at it have simply braved doing it more times, until it becomes an acquired (learned) skill.

And it is a skill that is massively worth mastering.

It is by far THE best way to deliver your content online and establish yourself as a leading authority in your field.

In my ‘10 Steps of Course Creation‘, filming and editing your course videos is Step 8. 


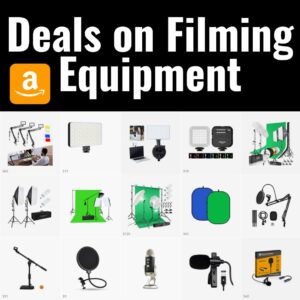
((Check out a list of equipment I recommend from Amazon HERE))


Step 8: Filming, Recording and Editing your Online Course

CLICK TO WATCH THE VIDEO: >> https://youtu.be/suXvwbNmraU

https://youtu.be/suXvwbNmraU


Getting on video to deliver your learning content creates a much higher level of engagement and connectedness with your learner compared to just communicating your content via text, audio, PDFs or slides for example.

Human connection is critical in any human interaction, and in the online world the next best thing to being in person is to look directly into the eyes of your viewer – through the camera lens.

Online course instructors who avoid the camera and opt instead for text lessons, voice-over slides or voice-over-screen recordings without the webcam on, miss out on 55% of the potential connection they could create with their students.

Connection that can only be created through human-visual stimulus – that is, eye-ball to eye-ball.

Video lessons have a much higher engagement rate, and online courses with video have higher completion rates and higher student reviews than those that do not.

By avoiding video, you are missing out on the potential of your impact, income and learner experience.


Video editing tools

There are lots of different video editing tools available out there today, and my best advice is to do a bit of research, join a couple of free trials and see which one clicks with you personally.

I personally use Camtasia, but here are just a couple that you can check out as part of your exploring:

Camtasia ($$$)

• Movavi ($$)

• Final Cut Pro ($$$)

• DaVinci Resolve (free)

• Lightworks ($$$)

• HitFilm Express ($$$)

You can even use the free software loaded by default onto Macs and Microsoft such as iMovie (free) and Windows Movie Maker (free) – although these have less features than the paid software, obviously.

Here is a video tutorial I recorded on how to use Camtasia to remove a green screen background, add PowerPoint slides and pop up text into a video:


Don’t read from a script

Should you script your online course videos or not?

As mentioned earlier in this section, I personally advise online course instructors to avoid using scripts if at all possible.

You would never stand in front of a classroom and stand there reading to them for an hour.

You would use your slides or handouts as prompts, and just teach what you know on free-flow.

Being ‘natural’ and letting your thoughts and knowledge just flow is much more enjoyable and engaging for your students.

However, for some online course creators, especially those just starting out, not having a script can be extremely nerve-wracking; but give yourself more credit – you know your stuff.

You know your content.

The more you get used to being in front of the camera, the more the brain-freeze will fade, and your genius will flow.

It.just.takes.practice.


Don’t just ‘wing it’

However, not having a plan at all can cause you to stray from the learning outcomes and waffle more than you need to.

Make sure that your Course Plan is complete, print it out and use it as your guide as you film each video.

When you have such an outline, you know precisely what you need to deliver in each video and are most likely to wow your audience.


Keep your videos short and ‘to the point’

I always recommend that online course instructors only deliver one key learning point per video so that it is easily consumed by your learner, as well as easy for you to stay on track when filming.

You can simply put 2-3 bullet points on post-it notes beside your camera to remind yourself of what you need to say in that video to get the one key outcome met.

This way, you will have a key point reference, but you will be able to talk freely and use your own expertise and personality to deliver the content of your video as you go along.


Know How To Structure Your Tutorial Videos

When it comes to filming and recording online course videos, understanding how these videos need to be laid out is also important. Just ‘talking and babbling along until you run out of things to say is not sufficient.

There is no set rule to what this structure should be, but a rule of thumb is:

  • Tell them what you are going to tell them (open with the lesson title and what your video is about)
  • Tell them (give them the info / teaching / content quickly and without fluff)
  • Tell them what you’ve told them (summarise)


Open with the topic/title of that video and what you are going to share with them

e.g., “Online course plans. In this video, I am going to show you how to create your own course plan to get your online course ready for filming.

Then get straight to delivering the tip, piece of knowledge or the guided demonstration of what they need to learn

Give a brief example to contextualize the new information then tell them what to do next (a task, action or what video is next)


Have Confidence On Camera

Confidence on camera is critical.

When you appear confident while you are recording the video content, you show your student that you know exactly what you are talking about.

Remember that confidence is not necessarily ‘big, bold and loud’. It just means calm, relaxed, comfortable, self-assured.

Although the first few times you stare down the lens, you will definitely experience a sense of terror, fear, sweating, you may freeze up (all natural signs of your body trying to protect itself from the unfamiliar setting).

But, your body will eventually realise that the camera is not a physical danger to your life and the physiological symptoms will eventually recede.

This is where your acting skills need to come in until your body catches up with you.

People cannot necessarily ‘see’ how we feel, and so, you can train yourself to step into the role of an actor/actress each time you step in front of the camera.

We do actually need to be ‘a bit more ‘us’’ when we are on camera to engage our viewers, as our energy and personality gets cut by about 50% as it filters through the lens.

So when filming, make sure that you turn up your natural personality; add in the extra smile, the slightly bigger gestures (without becoming an over-zealous Italian pizza-thrower), the assorted but balanced tone of voice (avoid the upward, higher-pitched intonations at the end of sentences!) and a friendly but assured tone of voice.

No matter how nervous you might feel, just remember that the students only see what you show, and with a little practice, this can be pure, unwavering confidence with lashings of likeability.

How to film your online course videos:

  1. Position yourself in the centre of your video, making sure your head is not cut off
  2. Press record
  3. Pause for 2-3 seconds 
  4. Smile 
  5. Look into the LENS of the camera, not the playback screen of yourself 
  6. Open the video with the name of the topic/lecture/video title 
  7. Deliver your video content (ONE tip per video) 
  8. End it with ‘and that is how you <<topic of video>> 
  9. Smile 
  10. Pause 
  11. Stop recording

That’s it!

A few tips:

  • Ensure You Have Eye-contact With The Camera Lens
  • Don’t look at yourself in the playback screen
  • Place your camera at eye-level
  • Prepare, but don’t read from a script
  • Talk slowly and clearly
  • Turn your phone onto ‘do not disturb’ or airplane mode to avoid interruptions
  • Don’t turn your back on the camera


Use The Right Equipment

The truth is, you really don’t need much more than a decent mobile phone to create perfectly adequate online course videos.

Here is some equipment suggestions to get you started: https://www.amazon.com/shop/cordinersarah?listId=1V5GDST6Q7SNI 


1. A smartphone

Mobile phones today have extremely good video quality, and are perfectly sufficient for creating tutorial videos for your online courses and social media.

If you are on a budget, your mobile phone is really the only tool you HAVE to have to get started.

2. A computer or laptop for editing and uploading your videos

A computer with a good processor/memory so that it won’t freeze and crash on you when you are processing large video files!

3. A Microphone for quality audio

Contrary to general assumption, good audio is actually more important than the visual quality when it comes to educational videos.

A lot of people watch videos from their mobile phones, so it is easier to get away with lower resolution videos, and it’s poignant to remember that video viewers are coming for the content, not the resolution of your retina.

Nobody cares about whether your hairline is slightly blurry if your content is good; but they will turn your video off if you sound like you’re presenting from inside a tin of baked beans.

You can get super cheap ‘lapel’ microphones that plug into your mobile phone headphone jack to get you excellent audio whilst recording on a mobile. You can get lapel microphones for your mobile phone for as little as $20 on Amazon.

3a) Lapel microphones:

‘Lapel’ microphones are small mobile microphones that can be clipped onto your shirt.

For those that want to know, I use a Sony Bluetooth wireless lapel microphone when I’m recording with a pro video camera (expensive end, around $300); and a BOYA lapel mic when recording on my mobile phone (cheap, around $20).


3b) Desktop microphones:

Desktop or free-standing microphones are great if you don’t plan to move around too much.

Good for recording podcasts, audio books, videos from your desk or if recording from a static position.

For those that want to know, the Blue Yeti USB Microphone is the desktop microphone that I use. It’s on the more expensive end but is great for those who are planning to take screen-casting, podcasting and interviewing to the next level.

4. Consider a Backdrop:

A backdrop is simply a material, matt or vinyl sheet that ‘drops’ behind you from a frame when you are recording videos, to either give the illusion that you are ‘somewhere else’, or to create a solid block of colour behind you that will allow you to ‘remove that colour’ and instead replace it with PowerPoint slides for example in the editing phase.

You can buy (or make) great backdrops to help provide a background effect on the videos that you will be shooting.


5a) Scenery Backdrops

If you prefer to have a ‘scene’ backdrop behind you, such as a plush-looking corporate office, a cosy library bookshelf, or bright geometric patterns – there are endless backdrops that you can buy to create a signature scene, or even keep it switched up without anyone ever knowing that you are just in your spare bedroom!

Just search on Amazon for ‘scenery backdrop’ and see what comes up!


5b) Chroma-Key Backdrops

Green/Blue screens can be used along with video editing software in order to create a specific effect in the background once the video has been shot.

You can get ‘pop out’ screens (which are my favourite as they don’t wrinkle), or fabric ones (which are cheaper but usually require ironing before use, which I’m not a big fan of!

6. Create a DIY ‘Film Set’

This is where you might ‘design’ a little area of your house or workplace to look like a television talk-show set, for example.

You could even hire a hotel function room or posh AirB&B to get that 5-star-setting look on a budget.

7. Ensure Your Videos Have Lots of Light

Don’t forget to use natural light to your advantage.

Record in front of big windows with the light hitting your face – NOT with your back to the window (this will make you look like a silhouette).

Also, do not film in direct sunlight – this can cause awkward face shadows and squinting, all which block direct eye contact with your viewers and diminishing the potential connection.

The same of course can happen with your studio lighting – make sure the studio lights do not cause any shadows around our eyes (making you look like an over-tired panda bear!).

Keep your lighting positioned at your eye level to avoid any face shadows.


Just Do It

It can be very easy to get stalled at this stage of course creation.

Whether it’s the fear of presenting, the imposter syndrome that pops up, thinking you have to have a million dollar studio before you start, or just plain old procrastination.

But giving in to any of these ‘stallers’ is like stealing from your learners – and from your own potential.

You HAVE to start somewhere.

You HAVE to have ‘version 1’ before you can get to ‘version perfect’.

SOMETHING is absolutely better than nothing.

So take a deep breath, press record and enjoy the journey!

If you want to learn how to become confident on camera and get support from me personally in getting your videos recorded and uploaded into your own online school, then join my nextConcept To Course’ 30 Day Course Creation Group Coaching program where I will guide you through getting those videos finally created!

5 Ways To Become a Well-Known Expert In Your Industry

Start Making Your Knowledge Work & Changing Lives Today

Take your knowledge out of your head and turn it into a profitable online business.

Dramatically increase your industry reputation, reach a global audience, gain a passive income and impact people's lives all over the world through your expertise.

Let me help you commercialise your IP, create and publish your courses and build a highly successful online business as a stand-out leader in your field of expertise.

Here are 5 ways that I can help you become a well-respected leader in your industry:

starter kit gold

FREE: Course Creation & Business Training

Get your FREE Course Creation & Business Training! FREE training to turn your passion, expertise & knowledge into a profitable online course, lift your global credibility & make a passive income!

Get The FREE Training
Book a Call

Book a Call with Me

If you have a number of questions, want one-on-one tech help or would just rather have a chat and guidance from me directly, you can book a call with me here.

BOOK NOW
the legends lab (1)

The Legends Lab

For those who are ready to become a stand-out leader in their field of expertise.

The Legends Lab is Sarah's ongoing coaching membership where you will learn how to become a well-known expert in your industry.

BECOME A LEGEND
plus

Concept To Course

Create and launch your online course or membership in just 30 days in my once-a-year course creation group coaching program.  Daily support, live calls, group learning and massive results, fast! 

JOIN CONCEPT TO COURSE
done for you course creation set up

Done-For-You Services

Why not just hand it over to the experts? I can create your course plans, set up your online school, create slides, connect all of your technology & software, create your email automations and more.

QET A QUOTE

Special Deals & Free Trials on my FAVOURITE Tech Tools & Software!

Click on the images below to get more information about the deals.

TekMatix is the market-leading all-in-one business platform, CRM and course creation platform.

It is your course platform, website, blog, email marketing software, ai bot, customer record management system, social media planner and auto-posting tool, calendar booking software, paid ads manager, sales manager and much much more. FIND OUT MORE HERE
Interact: Quiz making tool

AppSumo: Tech deals for business tools

Podcast.co Podcast hosting & distribution

Camtasia: Video Recording & Editing

Canva: Graphic Design

VideoAsk: Interactive Video Funnels

StreamYard: Livestream To Multiple Channels

TubeBuddy: YouTube Analytics & Competitor Data

Fiverr: Freelancers & Cheap Services

HeySummit: Host Summits and conferences

Creative Fabrica: Graphics, Illustrations and Images

Envatoelements: Unlimited Commercial Use Video Clips, B-roll, Audio, Music, Sound Effects

Loom: Record your screen and face videos

Course creation equipment that I recommend on Amazon

Latest Articles by Sarah Cordiner